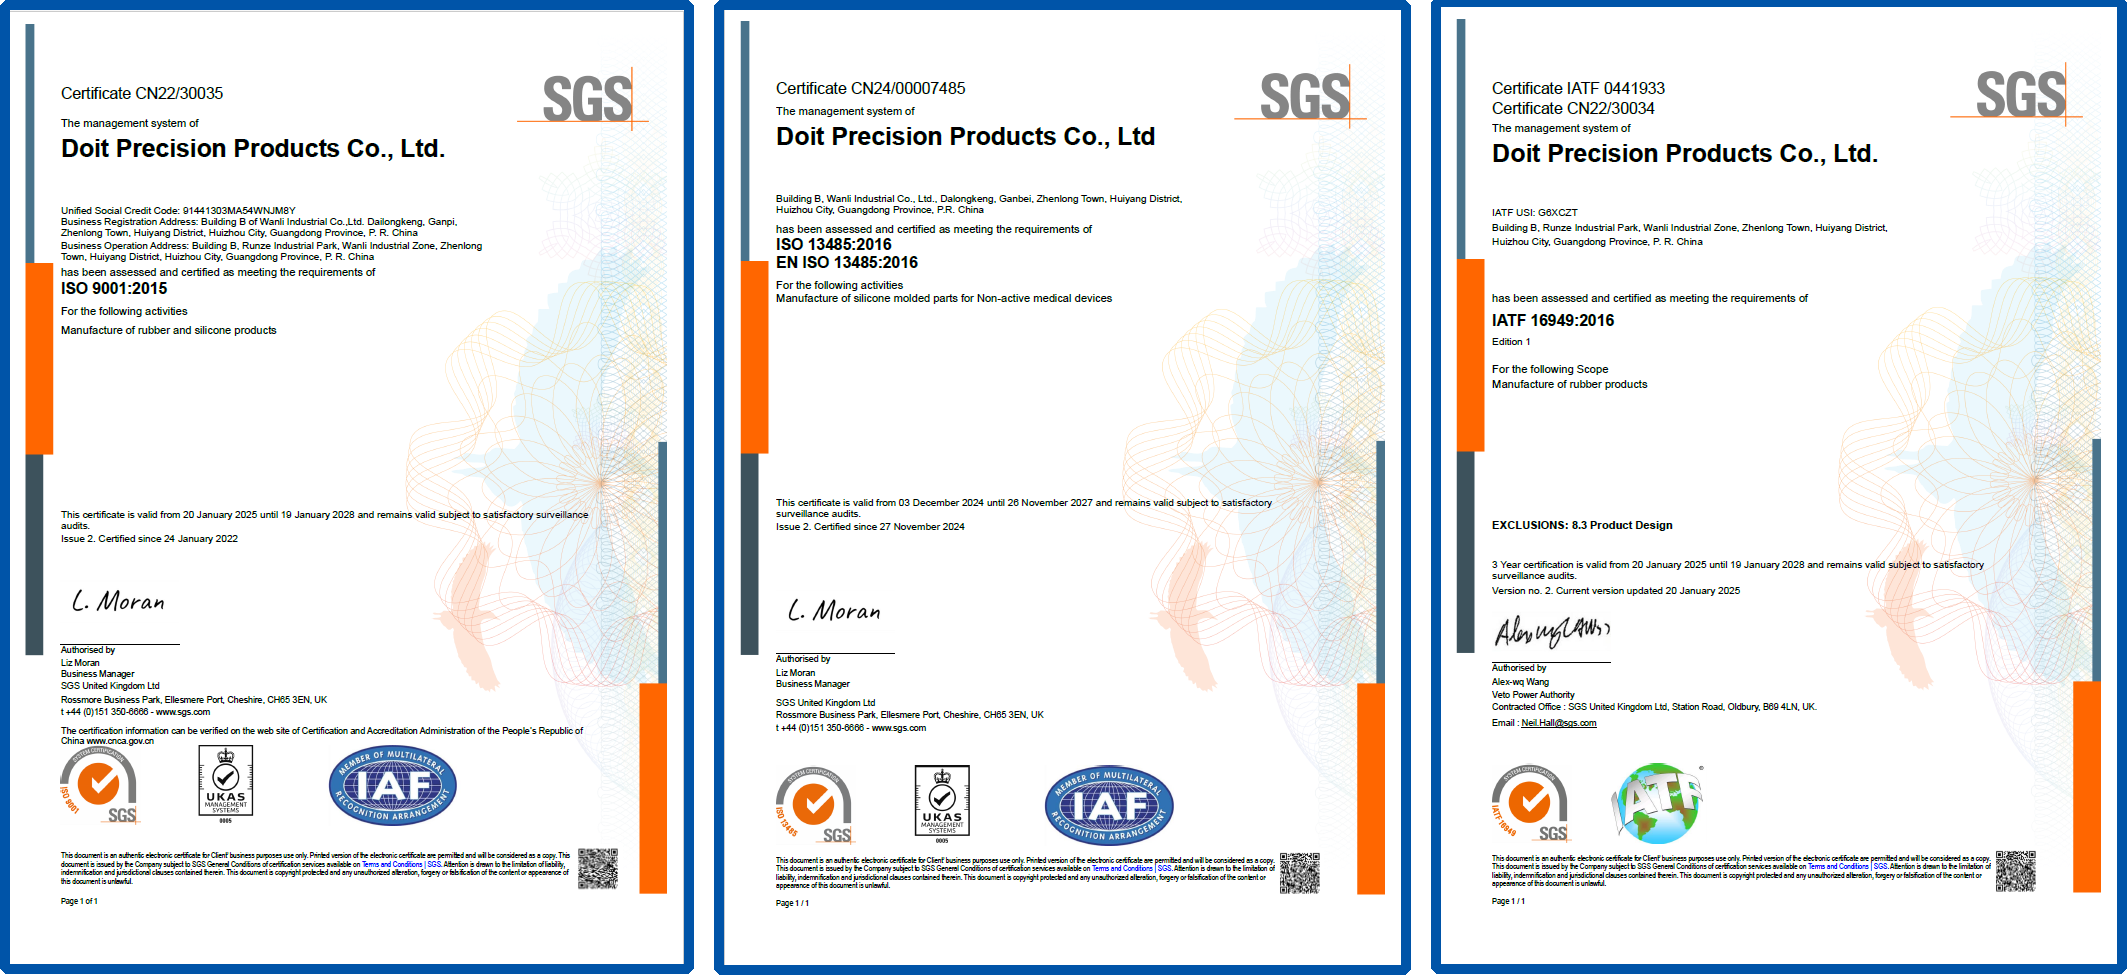
IATF16949 is mainly used for products in the automotive industry. It keeps an eye on the whole process, from research and development all the way to shipping out the goods.
ISO13485 is mainly used for medical products. It oversees the entire process, from research and development right through to shipping.
ISO 9001 is one of the most widely used quality management frameworks around the world. Its main goal is to help organizations make sure their products or services meet customer needs through systematic process management, and keep improving their quality performance.
?
?
SGS Quality System Certificate
?
?
DOIT Internal quality management review procedures
?
IQC?Detection
1. Incoming material inspection: The warehouse keeper must prepare a "Material Receipt" based on the delivery note provided by the supplier or customer, and submit it together with the supplier's inspection report to the Quality Control Department (IQC) for incoming material inspection.
2. Inspection of raw materials:
1) Data confirmation:Before the IQC inspection, verify whether the supplier is on the "List of Qualified Suppliers", and at the same time check whether the "Raw Material Incoming Inspection Standard" has the standard for this material.
2) Confirmation of packaging and appearance: Confirm whether the packaging and validity period are qualified (if the validity period is less than 1/4 of the total validity period, email to the purchasing/molding /PMC to arrange for production as soon as possible).
3) Production of test pieces and fasteners:
①IQC randomly selects 300 to 500 grams of materials from each manufacturing batch based on the "Material Receipt" provided by the warehouse keeper.
② Mix and discharge the materials in accordance with the material preparation operation manual.
③ Put the mixed materials into the mold to press the test pieces and test clips.
4) Sample requirements: The quantities to be pressed are as follows: Per batch: 2 test pieces, 6 hardness blocks, and 3 large test clips for permanent compression deformation. Vinegar resistance/particle test: 10 pieces of formed gaskets; Oil spill test: Formed 10PCS O-rings;
5) Inspection:
① Color: For colored materials, the color of the project signature sample should be checked. If it is basically consistent visually, it is qualified.
② The remaining items shall be inspected and determined in accordance with the "Raw Material Feeding Inspection Standards", and the inspection methods shall be carried out in accordance with the operation instructions of each instrument.
?
IPQC?Detection
1. The timing and sample submission requirements for the first appearance inspection: First inspection confirmation must be conducted when changing molds, machines, parameters, or materials. Visual inspection: Visual confirmation is carried out based on work orders, drawings, SIP, color samples and limit templates, etc.
2. Assembly: Products that require trial assembly as specified in the work order must undergo trial assembly. The first mold product is divided into 9 areas according to the 9-grid area. The determination of assembly: there should be no curled edges, too loose or too tight assembly, water leakage, or unsmooth assembly, etc.
3. Flash control:
1) All products must have their burr thickness measured. The burr thickness should be determined according to the work order standard, and samples should be taken in a five-grid manner.
2) According to the removal method required in the "Work Order", conduct a trial removal of the burrs on the product and complete the mold.
4. Machine parameters: Confirm parameters such as mold temperature, material weight, and vulcanization time according to the requirements of the work order.
5. Inspect the mold:
1) Confirm that the mold number is consistent with the mold number required by the work order. If not, stop the machine immediately and report to the team leader.
2) Confirm whether the mold status in the mold name field is "Available" or "Available (FA)".
6. First piece determination: When all items meet the requirements, the first sample can be determined as OK and notified for molding production. Conversely, the first item is judged as NG.
7. Inspection: Generally, the appearance, visual deviation of the mold after edge removal, assembly, test removal of burrs, vulcanization time, pressure, mold temperature, material weight, and inspection frequency shall be carried out in accordance with the production process instruction sheet.
1) Sampling quantity for inspection: Random sampling of products produced within every 4 hours is conducted for appearance inspection and the inspection report is recorded. The sampling quantity is shown in the table below:
①If the work order has special requirements, the "Work Order" shall be followed! If any abnormality is found, the sample size can be increased to confirm the quality condition.
② The thickness and thickness of the burrs shall be carried out in accordance with the requirements of the work order standards.
8. Record inspection results: The inspection results of the process, such as appearance, assembly, hardness, burr test removal, mold temperature, material weight, and machine parameters, shall be recorded in the "Molding Inspection Record Form".
?
OQC Detection
1. Appearance: Confirm the appearance based on the work order, SIP, and sample.
2. Labels: Labels must not be manually altered, and new labels must not be directly used to cover old ones on the packaging.
3. Color: Check the sample and pay attention to the difference between transparent and semi-transparent.
4. Assembly: Products that require trial assembly as specified in the work order must undergo trial assembly. The assembly quantity shall be carried out in accordance with the "Sampling Plan".
5. Structure: Verify that the product structure, engravings, and cavity numbers comply with the requirements of the drawings.
6. Before spot-checking products, OQC should first review the work order. For all colored products, color differences should be checked before spot-checking, especially for white medical products, the color of the shipped products should be consistent.
7. For the products of screws, first test the tensile force (6 kilograms) as required by the work order, and then spot-check the products in accordance with the "Sampling Plan Form".
8. Before spot-checking the oil-injected duckbill valve (check plug) products, the OQC should verify that the oil quantity of the goods taken from the warehouse is consistent with that of the newly produced ones. For several models shipped together from the same customer, the oil quantity of the duckbill valve (check plug) should be consistent.
9. After the QC random inspection of the on-board products is qualified, they need to be cleaned. After the cleaning is completed by the cleaner, the OQC needs to check the cleanliness under a 20x microscope. At the same time, it is necessary to randomly inspect the products to ensure there are no curled ones. If there are, they will be returned.
10. Records: The results of visual inspection are recorded in the "Sampling Inspection Record Form", and the results of dimensional inspection are recorded in the "Dimensional Measurement Record"
11. Judgment: For severe appearance defects, 0 are accepted and 1 is returned. For minor defects, acceptance or rejection is allowed in accordance with the "Sampling Plan".


